In case you missed it, here’s Part One of our canopy endeavor.
Once I had my canopy colored a darker brown, it was time to consider how I would hang it. I’ve seen pictures of shade sail canopies, which only need three points to secure the shade.
I tried this route first, because I thought I would try only using three areas for hanging. I screwed some cups hooks into the fence that runs behind our eating area and hung an S hook from an overhang.
Unfortunately, it left too much of the dining area out in the sun. Someone would have had to continue to toast. Not acceptable. Back to the drawing board. Now I knew I would need all four corners of the canopy to cover my eating area properly. Good thing I installed more grommets!
I tried adding a pole to a planter to give me a fourth hanging point, but the planter was in the flow of traffic and in danger of tipping like a cow. Plus, it was hanging too low.
Still brainstorming, I considered installing a tension poll across the archway (correct term?) by our back door. I couldn’t find any tension polls long enough so I used a shower organizer pole.
The plan was to use a couple of S hooks on the pole and stretch the canvas across the patio. This idea seemed brilliant. However, the pole sagged too much in the middle and I was afraid it wouldn’t hold the weight of the canopy. I couldn’t add support to the pole with drilling a hole. Damn gravity. Or physics. Or whatever.
Then I thought, what if I did two poles vertically and screwed in some hooks to the top of each pole? That way, there wouldn’t be any excess weight on the pole and guests wouldn’t have to fear the entire thing would come crashing down on their heads. Awesomeness!
When I tried to install the shower pole vertically, it was about one and a half inches too short. I added another pole section to make it longer but it was too long. When I tried to muscle it into position anyway, the spring broke. Crap. The pole would now fit but it had no tension left. It would not be stable enough to hold the canopy in place.
Cue the whomp whomp music now.
It was at this point, I began to give up. I had run out of ideas that didn’t involve making holes in the bricks. I asked Husband if he thought it would be a big deal to drill two itty bitty holes in the brick. He began to list all of the things we would need and I just heard the cash register in my head adding more to the tab on this money pit project.
I went back out to the patio, sat down, and sulked. I was tired and running low on funding. I was throwing in the towel. That is when my knight in shining armor showed up. Husband went to his tools and discovered he had the parts that could make this blasted canopy work, so no more $$ needed to be spent. Hurray! I still considered scraping the entire project but Husband cheered me on. After all, I had put so much time, energy, and money into the project so far; why not try to finish it? Especially when no more funds needed to be wasted.
I know I was trying to avoid anything permanent, such as drilling holes, but Husband assured me it would take .02 seconds to fill the tiny holes with some silicone and no one would be the wiser. I accepted defeat and moved on.
After the cups hooks were in place, I stretched the canvas across the patio to the two waiting S hooks that I hung on the little over hang. I secured the S hooks with some industrial strength Velcro, so I could remove them if needed.
And viola! A shady dining area!

Budget breakdown (only for the successful result *ahem*):
Canvas drop cloth - $12
Dark brown dye - $4
Grommets - $4
Cup hooks – on hand
S hooks - $4 for two
Grand total = $24
In the interest of full disclosure, with my failed attempts, the total came out to $55. Ouch. I was able to return some of the items but I ate the cost of the broken shower caddy, wooden pole, and other misc materials. I am determined to use this canopy at least once. My sacrifices must be validated!
What do you think? Have you ever had a project with multiple obstacles to overcome? Ever gone way over budget because of mistakes?
I would like to thank my dear husband for his amazing support. Without you, my Wesley, I would not have accomplished this project. Or several other things in life. You keep me going. You are just too awesome for words to do justice. Thanks my Handsome Husband! You also look mighty sexy wielding a drill! Rawr.
3
Once I had my canopy colored a darker brown, it was time to consider how I would hang it. I’ve seen pictures of shade sail canopies, which only need three points to secure the shade.
 |
| Source here. |
I tried this route first, because I thought I would try only using three areas for hanging. I screwed some cups hooks into the fence that runs behind our eating area and hung an S hook from an overhang.
 |
| Simple cup hooks. |
 |
| Hook size = 3"/76mm |
 |
| The overhang. |
Unfortunately, it left too much of the dining area out in the sun. Someone would have had to continue to toast. Not acceptable. Back to the drawing board. Now I knew I would need all four corners of the canopy to cover my eating area properly. Good thing I installed more grommets!
I tried adding a pole to a planter to give me a fourth hanging point, but the planter was in the flow of traffic and in danger of tipping like a cow. Plus, it was hanging too low.
 |
| Strike two. |
Still brainstorming, I considered installing a tension poll across the archway (correct term?) by our back door. I couldn’t find any tension polls long enough so I used a shower organizer pole.
 |
| I bought this one from Bed Bath & Beyond for $16. Yay for their coupons! |
The plan was to use a couple of S hooks on the pole and stretch the canvas across the patio. This idea seemed brilliant. However, the pole sagged too much in the middle and I was afraid it wouldn’t hold the weight of the canopy. I couldn’t add support to the pole with drilling a hole. Damn gravity. Or physics. Or whatever.
 |
| Strike three. *sigh* |
Then I thought, what if I did two poles vertically and screwed in some hooks to the top of each pole? That way, there wouldn’t be any excess weight on the pole and guests wouldn’t have to fear the entire thing would come crashing down on their heads. Awesomeness!
When I tried to install the shower pole vertically, it was about one and a half inches too short. I added another pole section to make it longer but it was too long. When I tried to muscle it into position anyway, the spring broke. Crap. The pole would now fit but it had no tension left. It would not be stable enough to hold the canopy in place.
Cue the whomp whomp music now.
It was at this point, I began to give up. I had run out of ideas that didn’t involve making holes in the bricks. I asked Husband if he thought it would be a big deal to drill two itty bitty holes in the brick. He began to list all of the things we would need and I just heard the cash register in my head adding more to the tab on this money pit project.
I went back out to the patio, sat down, and sulked. I was tired and running low on funding. I was throwing in the towel. That is when my knight in shining armor showed up. Husband went to his tools and discovered he had the parts that could make this blasted canopy work, so no more $$ needed to be spent. Hurray! I still considered scraping the entire project but Husband cheered me on. After all, I had put so much time, energy, and money into the project so far; why not try to finish it? Especially when no more funds needed to be wasted.
 |
Sometimes, you just need a supportive husband to save a project, |
 |
| When you remove the canopy, the hooks are barely noticeable. |
I know I was trying to avoid anything permanent, such as drilling holes, but Husband assured me it would take .02 seconds to fill the tiny holes with some silicone and no one would be the wiser. I accepted defeat and moved on.
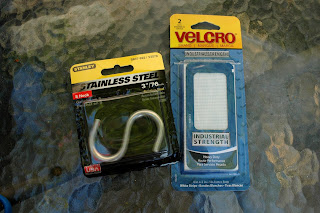
After the cups hooks were in place, I stretched the canvas across the patio to the two waiting S hooks that I hung on the little over hang. I secured the S hooks with some industrial strength Velcro, so I could remove them if needed.

And viola! A shady dining area!

Budget breakdown (only for the successful result *ahem*):
Canvas drop cloth - $12
Dark brown dye - $4
Grommets - $4
Cup hooks – on hand
S hooks - $4 for two
Grand total = $24
In the interest of full disclosure, with my failed attempts, the total came out to $55. Ouch. I was able to return some of the items but I ate the cost of the broken shower caddy, wooden pole, and other misc materials. I am determined to use this canopy at least once. My sacrifices must be validated!
What do you think? Have you ever had a project with multiple obstacles to overcome? Ever gone way over budget because of mistakes?
I would like to thank my dear husband for his amazing support. Without you, my Wesley, I would not have accomplished this project. Or several other things in life. You keep me going. You are just too awesome for words to do justice. Thanks my Handsome Husband! You also look mighty sexy wielding a drill! Rawr.


